


Key Steps
1.
2.
3.
4.
5.
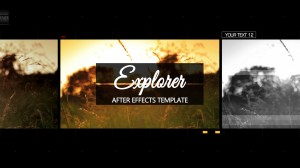
Prepare the template
Precompose the Render This composition
Apply a time stretch effect
Speed up your videos
Render your customized project
0 : 23
0 : 50
1 : 23
2 : 05
2 : 45
2.
3.
4.
5.
Precompose the Render This composition
Apply a time stretch effect
Speed up your videos
Render your customized project
0 : 50
1 : 23
2 : 05
2 : 45
Tips and Tricks
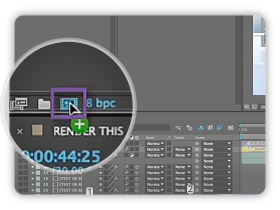
Create a New Composition
Drag your item on the button at
the bottom of the Project panel.
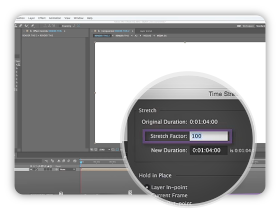
Time Stretch Factor
Choose Layer > Time > Time Stretch
to speed up or slow down an entire layer.
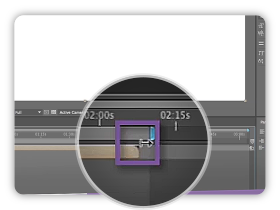
Define Work Area
Adjust the left and right locators
to shorten or extend your project.
Tutorial Transcript
In this tutorial, I will show you how to adjust timings on our after effects templates. I will use our template Stylish lines as example to work with it. The goal in this example is to slow down the animation by 2 and still display a normal speed to your media.
First you have to build your template, add text, media and logo. When all is ready, the first step is to slow down the global animation. We will apply a time stretch effect to the main composition which is called Render this. For this, we need first to precompose the render this composition. In the folder panel, select the Render this composition and drag on the create a new composition button. You have created now a new composition named Render this 2.
We need to extend the timework area. Go to composition, Composition settings and change the duration to 3 minutes. Zoom out a little bit then right-click on the Render this composition and select time and time stretch. Now change the stretch factor to 200% and click ok. Here you go, the animation is now slowed by 2. If you are using pictures or photos, your template is ready to render.
In the cas of you are using videos, you will need to speed up every media by applying an inverted time stretch. In the folder panel, open the Media folder and the Media 1 composition. Select your media, right-click, select time and time stretch. Change the stretch factor to 50%. Here you go ! Repeat this operation on the other media compositions. The your project is ready to render.
I hope this tutorial has been helpful for you. Feel free to contact me if you have any questions. Thanks for watching!
Comments are closed.